


- Art Area Shield Liger Bang Spec. Review
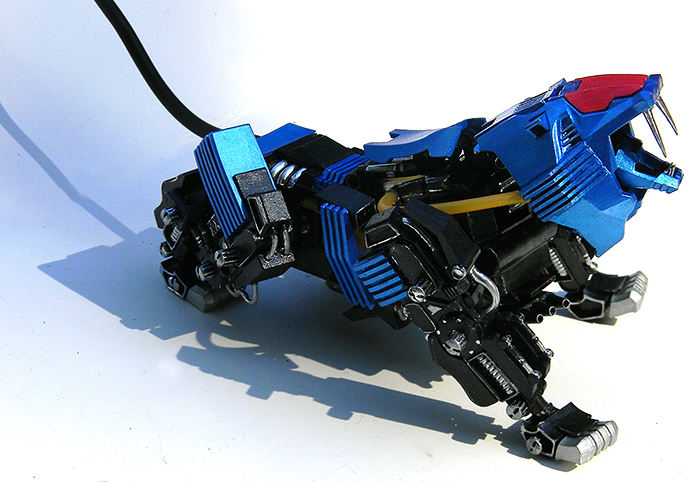
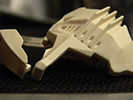
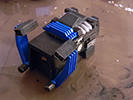
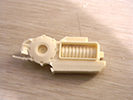
The Art Area Shield Liger is an unpainted resin kit, which was sold by Art Area at Wonder Festival 1999, licensed under both Tomy and ShoPro. It was one of the first articulated Zoids in the NJR era. Many people have seen this Zoid's box float around in the ethers of the internet, but very few have been completed, and all of those seem to be in the Japanese speaking community. So I'll be splitting this page up into two: One for the review, and one for instruction translations and the build process. This was my second custom, so there were many mistakes made along the way, but I hope I can demistify this kit for everyone else who opened the box, saw screws and hoses, and went "UUUUUUUUuuuuhhhhhhh........" before promptly sealing it again.
Name: Shield Liger Bang Spec. (ARTAREA シールドライガー バン仕様)
Maker: Art Area
Price: 14,800 Yen
Sold At: Wonder Festival 1999
Pros:
- Anime accurate proportions with good posability
- Multiple cockpit assembly options, including single or double seater options
- Wires and tubes used for articulating the tail and details
- The rubber materials used have stood up well to time (they are 20 years old at the time of writing this)
- Unconventional materials give this Zoid a unique look quite unlike other Shieldies
Cons:
- Back rear legs come apart easily because of insufficient surface space and weak pipes
- Many thin connection points that make small parts, like tubes and leg armor pop off easily
- Ball joints are nowhere near big enough, and cannot support its weight without doing serious coating
- Thin connecting pegs on missile pods snap easily
- Some separate parts are unnecessary and even interfere with the final look as a result of being separate
General Opinions:
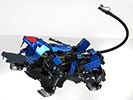
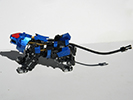
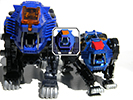
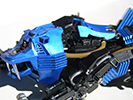
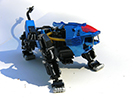
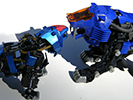
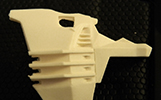
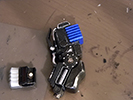
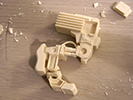
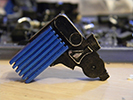
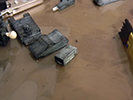
The Art Area Shield Liger is an amazing looking kit, and I personally love miniatures, so in spite of how much I messed up the paint in some areas, I'm super happy with this kit. However, opening the box is overwhelming, even to people who have a lot of experience building resin kits, because most kits are straight forward. This one doesn't look straight forward because of the unconventional tubes, screws, washers, etc. So, for what it's worth, for all you people out there staring apprehensively at your ligers, it's not as complicated as it seems.It is, however, extremely fragile in some places. You have to be really careful with the pipes, because they pop off easily while moving around the kit and they have some pieces that are difficult to trim. The kit in general has a lot of huge resin chunks that attach the parts to the sprue. It's also worth mentioning that the midsection of the back legs is woefully inadequate for the amount of stress that'll be placed on those parts. Even after drilling much deeper holes for the pipes, the pipes themselves are very weak, and break easily when trying to pose the leg. So watch out for those parts. Maybe build them a little loose, just to be sure. All in all though, as long as you're careful and patient, you'll be fine. Nothing on this kit is absurdly difficult, just tedious.
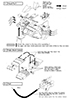
- Photos
- Gimmicks
- Cockpit
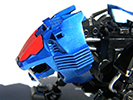
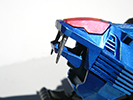
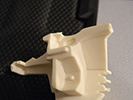
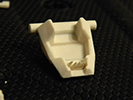
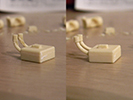
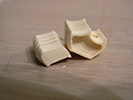
The Shield Liger comes with two cockpit types, one that is flat, and one that has a notch on the end so that it can stand up, like an open cockpit. Because the kit is aiming for anime accuracy, there's no place for the hinge that wouldn't interfere with how the anime renders the nose of the liger. So, two cockpits was a decent option. It's also worth mentioning that my sealed cockpit chipped right in the middle (at the bottom) when trying to remove the large resin chunk attaching it to the sprue. So, if you're careful, you'll have a straight edge for the bottom.
I personally found that the sealed cockpit was easy enough to remove without needing to glue it down. The cockpit also comes with a second pilot seat which can be optionally installed. I'm happy for this, because while I wanted to go with the one seater in the first place, one of the pieces I cut ricocheted the other seat into a different universe.
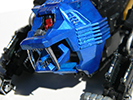
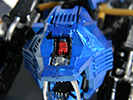
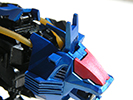
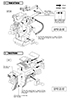
- Jaw
The Jaw opens and closes, but can't close all the way because the width of it comes into contact with the sabers.
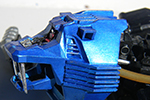
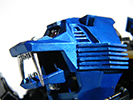
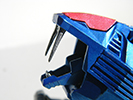
- Head and Neck
The neck has a ball joint on each end, which allows both the neck and the head itself to move up and down. The neck is very thin, width wise, which is interesting. You won't notice because the mane covers it from above, but the thinness actually gives you more articulation, because the top of the neck can push the upper E-Shield Generator up so that it doesn't interfere with movement.
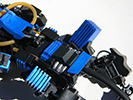
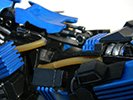
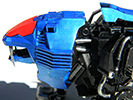
- Shield Generators
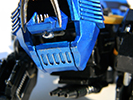
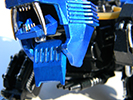
Both the top and bottom Shield Generators flip open. The upper one is a bit finnicky. You have to custom carve the slot for it. It's recommended to do a track, instead of a perfectly fit hole, because otherwise the squareness of the front of the piece may conflict with the back of the head, preventing it from lifting. My track was sloped, though, which means mine sinks a little too far downwards when it's activated.
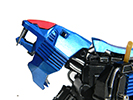
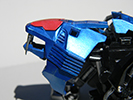
- Back Panel
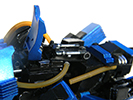
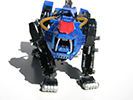
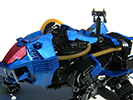
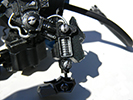
Shield Liger's back panel flips up to reveal the AMD 2-Barrelled 20mm Beam Gun. I found the pegs that this is supposed to slot onto way too short, and I didn't want to drill through the pretty blue armor. Layering it up with a clear coat or glue would work fine for making it snug. It just takes a few layers.
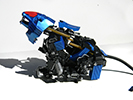
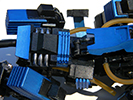
- AMD 2-Barrelled 20mm Beam Gun
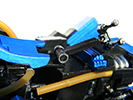
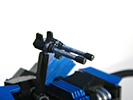
So, I'll confess that in my reviews I forgot to drill the peg for these! But, just like the model kit the arm is on a hinge joint at the bottom, and the top gun is on a ball joint so it can swivel in almost all directions. For some reason I have a heck of a time getting it to lay flat, though.
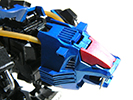
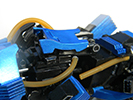
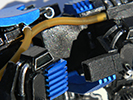
- Anti-Zoid 3-Barrelled Shock Cannon
The chest gun is attached to a thick peg, allowing it to swivel left and right. This is an interesting change considering it's usually treated as a static weapon. It can move quite a ways depending on how the legs are posed.
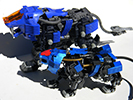
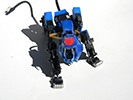
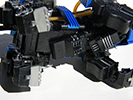
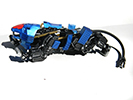
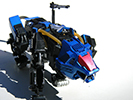
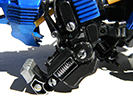
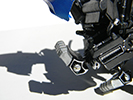
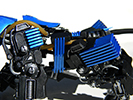
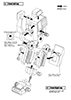
- Legs
Forgot to take pictures showing the range, but all four of Shield Liger's legs are attached to large ball joints. This means the legs can rotate 360, but also tilt quite a ways inwards or outwards. Perfect for those more complicated poses, like sitting down. The pipes and plate across the front of the leg come off very easily, though, so be careful not to apply pressure to these.
- Elbows
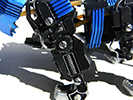
Each mid-leg joint on the liger uses a screw as a stand-in peg. The elbow is no exception. You can bend it forwards and backwards, and because there's a gap between the 2 pipes on the front legs, the silver pipe actually doesn't interfere with it much at all.
- Toes
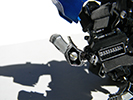
Although the claws are meant to be glued in, they fit snug enough that I didn't find this necessary. So I left them loose, allowing the toes to move down a bit for better posing options.
- Feet
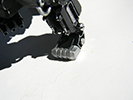
The feet are on ball joints. Incredibly... tiny... ball joints. For what it's worth, though, I didn't notice any stress marks on these, and in spite of coating them up quite thick to be able to fit snug in the tube, none of them broke. It still creates a bit of a strange pinch point visual around the ankles, but allows them to rotate up, down, and swivel side to side. (The last photo is next to the Moto Shield Liger)
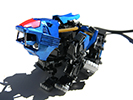
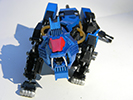
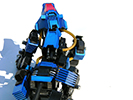
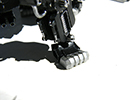
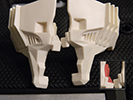
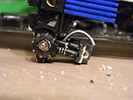
- Back Legs

Unfortunately, the back left leg had many, many fitting issues that I struggled with, resulting in the paint being brutally murdered, so apologies for that. But, like the front leg, it attaches using a screw, which can rotate forwards and backwards. The range of motion isn't very much. The heel has a range of even less, due to the thick parts on the top and bottom. However, the most important thing of note here, is that the back leg pipes aren't quite sufficient to support the pressure of movement, meaning everything (starting at the heel) detaches under pressure.
- Mid Section
The mid section is attached with a fairly long ball joint, but you can use one of the shorter ones to close that gap more if you prefer (there's one or two extra joints). It can rotate up and down, or side to side. Interestingly, the belly section that the gun attaches to is also split into 2 halves that are attached by a screw. This allows the belly to bend with the body, to an extent, helping to avoid part of that gap.
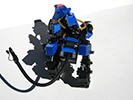
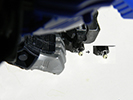
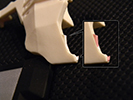
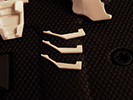
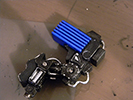
- Missile Pods
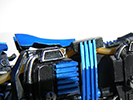
The Missile Pods are another problem area. They attach on a single thin peg that's off to one side. This peg cannot withstand the force of twisting, so I had to supplement a hand made wooden peg to make them articulated. Even then, the missile pods had trouble folding up all the way. I've shown the better of the two. Like the other kits, though, they fold in or out.
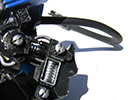
- Tail
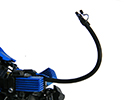
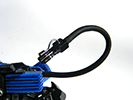
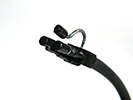
Shieldy's tail uses a black rubber tube and a wire that goes through it. In spite of being 20 years old, there are no cracks in the tubing. It has held up amazingly well, and the articulation is nice. It also has the anime-accurate tail (which the HMM Shield Liger Bang Spec. calls a peeping tail).
- Art Area Shield Liger: Instructions

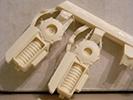
Hello! So, while I've covered a lot of the finished photos of the Art Area Shield Liger in the main review, I also thought it'd be helpful to include a build review and vaguely instructional page. There's little to no information on this kit in English-speaking communities, and when you open it up, it can be quite alarming to be presented with screws, tubes, and wires. The Liger isn't as scary as it looks though. As long as you're slow and patient, it's a relatively easy build. I'm making this page both to demystify its first impressions, and to clarify some things that are absent in the 5-page instructions.
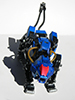
I'd also like to preface this by saying that the photos on this page are going to be very sloppy. Most of them are small, blurry, and/or grainy. My home lighting is pretty dim and I didn't spend any extra time clearing away resin scraps while I was working at my stained craft table. So I apologize for the mess!
- Translated Instructions
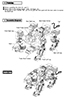
- Getting Started
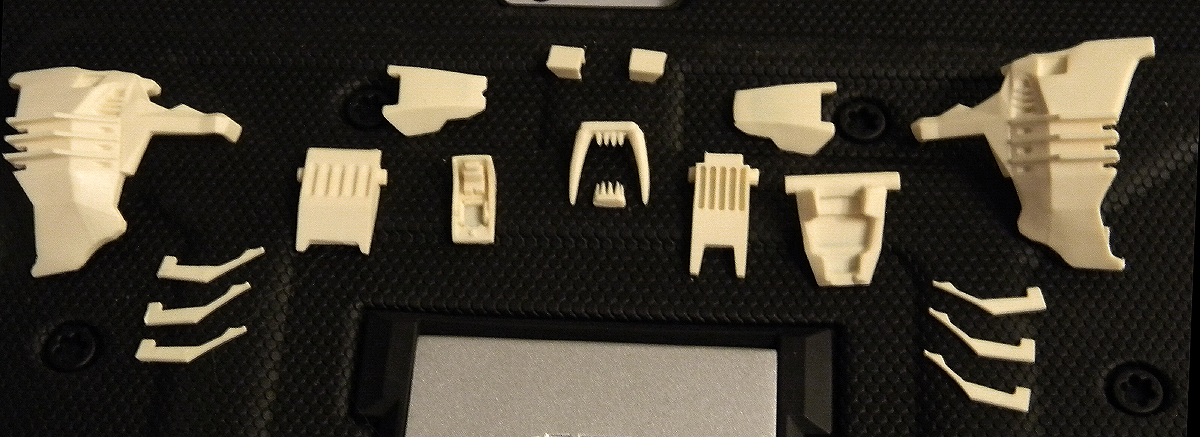
Tools Needed:
- Nippers (for removing from sprues)
- X-Acto Knife (for cleaning flash)
- Pin Vise (for holes that were filled)
- Sand Paper (for cleanup)
- Paint (this is an unpainted resin kit)
- Paint Brushes (for the above)
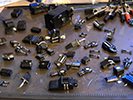
I won't pretend to know much about painting, so take that as you will. For the rest, it's mostly to clean up the excess resin. The kit surface looks pretty nice but many parts have thick resin blocks attached to them. An X-Acto Knife would be greatly preferred over thicker blades because many of these areas are small, and you'll want to be able to scrape away excess resin.
We're going to be going over the clean up and assembly for each step below.
- Don't Forget to Wash Your Zoid!
 With all resin kits the first thing you want to do is wash every single part. You can wash them with basic dish detergent and water, but wash them thoroughly. This helps remove any residue or mold release from the item, and is important both for safety reasons and for any painting you want to do later.
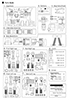
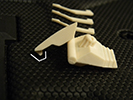
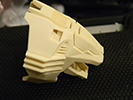
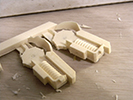
- Head Assembly
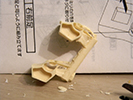
So here we see all the pieces for the head. There's quite a few, and not all of them fit by default. So do not glue the head pieces together until the last step, in case there is need for adjustment.
- Part Trimming

I trimmed these blocks off of the back of the mane (2nd image). You'll also need to cut out a shape for the E-Shield generators (3rd image). In the 3rd image, the right side is cut, the left side is uncut. Use the X-acto knife to carefully cut along each side to cut out the square.
- E-Shield Generator (Top)
There are no pre-drilled holes for the E-Shield generator. There are grooves, but they aren't deep enough for the pegs. So I hollowed out the holes in the ears using the pin vise. If I had thought of it at the time, I would have been more careful to carve them in a slant so that the E-Shield Generator could glide more smoothly. It needs to move front to back within that section, not just have a hole big enough for the peg. Otherwise, either the front of the part won't stand up correctly, or will leave a large gap in the front.
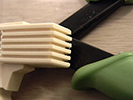
- Mane (Sides)
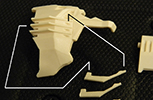
Next are the head slats. These parts are incredibly thin, so be careful. Hold the parts firmly on both the top and bottom, to ensure there's no sideways twisting when they're cut from the sprues. Also hold the back of the piece securely while trimming the flash.
There are notches on the sides of the head where the front of each slat goes. This is a bit of an odd design choice, and if I'm being honest, it was a poor one. They're not perfectly even as a result, and it's noticeable.
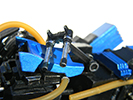
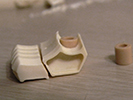
- Cockpit
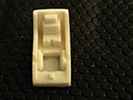
The interior of the cockpit is composed of 2-3 pieces. The main seat, a second (optional) seat, and a small console piece that goes in front of it. Unfortunately I don't have the other 2 pieces pictured. The console because I forgot, and the second seat because it catapulted itself into the void when I cut it from the sprue. Which is ok. I didn't want it anyway. Assemble the pieces, then insert it into the inside of the head (5th image).
The AA Shield Liger has 2 canopies. One has a notch on the bottom, and one doesn't. To match the anime representation they had to do away with the hinge on the nose, so instead you can choose between the two. The Open type has a notch on the bottom to glue it ontop of the nose, always open. The closed version fits snug enough you don't really have to glue it.
It's worth noting that the cockpit seat did prevent the head from closing entirely for me, so may need some extra sanding on the side.
- Jaws and Teeth
The Shield Liger jaws have a long peg, so before you glue the head, make sure you drill out holes large enough for a good fit. Glue the upper fangs into the mouth after assembling the cockpit.
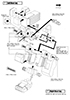
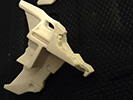
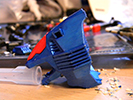
- Body

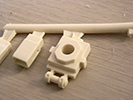
Not much of the body requires discussion. The first two images are the parts for the front of the body. Slide the second piece down into the first, to create the neck joint. For the rest of the body, the instructions should suffice.
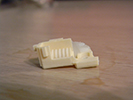
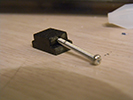
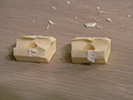
Missiles
There's a small square indentation on the backsides of the missile boxes. Carve that out with a dremel, then glue it to the bar on the missile arms. The hole should be on the lower half of the piece to ensure you're not gluing them on upside down.
The front-facing side of the missile arm is just for show. The back side is a long peg. Drill a 1.8 mm hole through the round lump on the bottom of the body square, and carefully insert the peg. If it is a tight fit, DO NOT continue. These pegs break with extreme ease. If they break on you, you can replace them with a basic metal rod and use your pen vise to drill a new hole. I personally went the cheap method and carved up a toothpick to use as a peg. Still holds better than the original.
I advise glue for the square sockets that hold the legs, as they slide out easily otherwise. Also, be sure to place the rear leg ones before the black plates that hold the side tubes, as they may interfere slightly with them otherwise.
Triple Shock Cannon
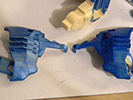
The Triple Shock Cannon is designed to bend with the body, so be sure to add a screw to the middle, don't just glue it!- Front Legs
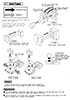
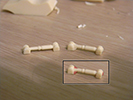
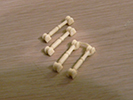
As you can see in the above photos, many of the pieces have thick resin attaching them to the sprues. Cut a little higher than you need to, or it'll take a whole chunk of resin out of your part. Also be sure to gently, but firmly hold any pipes while cutting them off, so that they don't snap from the pressure of the cut.
The front legs are fairly simple. Glue on the pipes, the pieces on the top, the caps, and the leg socket. Then hold the lower leg halves together over the circular indent on the bottom of the shoulder piece. Drill your hold through all 3 pieces, careful to keep it level, and insert the screw.
By the 5th or 6th cap my hand was dying. Since I also balance kit building with artwork I took a lazy exit and screwed the screws in backwards, so I could glue the caps directly onto the screw head.
The leg pipes on the fronts of the lower leg will have a tiny circular bump, to line them up to a tiny circular dip in the leg itself. Once everything is on, attach the bottom of the leg (where the rubber piece will go) and the curvy plate on the back to help hold it all together. Use glue for these steps, and be careful that your leg halves are aligned. If the peg that holds on the bottom ankle piece is misaligned, gently rotate one half of the leg until they're lined back up.
- Trimming
After the pieces are removed there's some trimming to do. You can see the trimmed (left) and untrimmed (right) pieces on the second photo.
Front of Legs
The angled armor in front of the leg, and the silver pipe that goes between the two lower leg pieces are attached by two tiny areas. Be sure that there is a nice, flat, square space for them to fit into. Carve additional space as needed, and glue these pieces last. They will come off at the slightest pressure, and you'll need to carve out the adhesive and glue all over again.
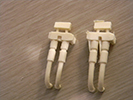
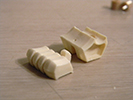
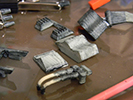
- Rear Legs

Infinitely more frustrating than the front legs. As you can see, there is a lot of flash. Often on fragile pieces. So be careful, and again, securely support the piece whenever trimming.
Top of the Legs
There are a lot of pieces here, but for the most part, just glue them on. Slot the pipes for the square box (at the top of the leg) into the two holes on top of the leg. Glue on those little rectangle X pieces and the caps. I might advise holding off on caps until the entire leg assembly is done. You'll need to drill some small indents for the leg pipes (on the knee) to go, but again, I advise doing this as a last step because you'll be moving these parts a lot, and they come off easily.
Middle of the Leg
This is where things get frustrating. Basically, the lower leg attaches to the middle section using 4 pipes. These are both weak parts and lack the surface space for glue, cement, etc. to develop a strong grip. You may want to deepen the holes that they fit into, but they don't fit well in the first place. Don't push too hard or the top pipes will snap right off.
It may be worth trying to pin them, but I was nervous it would put too many holes through the block. Someone more experienced may have better luck. Be sure to attach the arching silver pipe on the back of this section first, as it'll be hard to do it later.
Before actual assembly, be sure to drill a 2 mm hole all the way through this heel piece. For this one, I drilled the two lower leg halves afterwards, because it was hard to grip the piece otherwise. Only after you have drilled the holes would I recommend gluing the middle leg pieces.
Lower Legs
Follow the same steps as with the front legs. Attach the two halves, insert the screw, and make sure that the peg on the bottom is aligned on both sides. If not, loosen the screw and rotate one leg slightly until they are aligned. If they will not line up, you may have the screw too tight. Then glue on the back plate and ankle socket.- Paws
The angle of the paws are not the easiest thing to trim. Be careful not to sheer off the top of the slope. How you handle the claws is up to you. I kind of liked that they could bend a tiny bit if I didn't glue them, so I left my claws unglued.
Ball Joints
Take the skin colored rubber pieces and pinch them, applying gentle pressure as you press them into the sockets on the foot. Do the same for a second piece, this time attached to the bottom of the front leg. The ball joints will need several layers of clearcoat to have enough grip to not constantly sag, so adjust them one coat at a time, and judge the tension for yourself as you go.
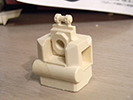
- AMD Beam Gun
My apologies, this is something I forgot to take pictures of. Since the tail is rather straight forward I'm gonna skip over here. You may want to glue the long flat plate for the gun, since otherwise it leans quite far downwards. For the armor going over the gun, it also did not fit on my kit. There was not a peg, it was just a vague nub. So I layered clear nail polish up on both sides, by just putting a drop on the end, letting it dry, then repeating. Clear coat or adhesive works just as well. The goal is to create a large enough bump there for the armor to stay secured.
- Painting
Let me preface by saying, paint AFTER assembly. In my naivety I thought that painting before would give me much better coverage behind joints and what not. Instead, I ended up destroying perfectly nice paint jobs because of the pressure required to fit some parts together, and general handling. I didn't want to clearcoat this kit because of the metallics, so your mileage may vary, but either way, it's just... a much better choice.
My Shield Liger was entirely hand painted. I've only ever hand painted one other Zoid before, so it was a bit... intimidating. You can see how awful it looks with fewer layers (the first few photos show 1 layer vs. 2, vs. 3, etc.) I stuck to the 'consistency of milk' rule and kept layering up, and I think it turned out all right!
The silver detailing was all done with the Molotow paint pens, and the colored paints were a mix of DecoArt and FolkArt acrylics.
- Final Words
There are a lot of details about this kit that can be a challenge. My leading advice would be, PAINT AFTER ASSEMBLY and use a lot of clear coat on those ball joints. None of the joints in this kit are tight enough to be sure on their own. So keep layering up.
That aside, this is a gorgeous little kit. It really does have that anime aesthetic, and while it makes some slightly odd design choices, there's much to love about it. I know I didn't follow the instructions to the T on this one, but I thought I would like it better with these choices, and I do. I'm sorry this page doesn't have photos for everything. A lot of the time I was so involved in the build that I just plain forgot to take them.
Either way I hope it can provide some insight into the build process for this kit, and help others work up the courage to try to build their own!
